Django Rest Framework using Python 3.7 on GAE Standard
How to build a web application using new Python 3.7 runtime on Google App Engine?
I started my programming journey more than 6 years ago and my first stack was a Google App Engine on Python 2.7 using webapp2. Then it was ok to use it, limitations on GAE was nothing comparing to the low costs and no devops. All you needed to do to scale a service was to correctly configure the yaml file. Then I moved to AWS for some time and now since more than a year, I’m mainly working once again on GAE using Python 2.7 and webapp2 or Falcon.
Finally, it comes the time when Google App Engine released new runtime: Python 3.7!
How to setup simple application using Django on top of Google Cloud Platform technology? Is it worth it?
Let’s create a simple REST API using tools that are mostly used to build a modern web application:
- Python 3.7 - programming language
- Django Rest Framework - web framework
- Google App Engine Standard - hosting platform
- Google Cloud SQL - database
Google Cloud Redis - cache- Google Cloud Tasks - tasks queue
- Docker (with docker-compose) - system virtualization and local development
Before you start
You don’t need to pay for Google Cloud Platform to try it! New accounts can get a free credit equal to $300 and it is more than enough to try new runtime! You can easily host your MVP or play with other services thanks to this option.
You can get another $200 free credit on GCP from GitLab if you would like to get started with GitLab’s GKE Integration. (My request was rejected… without any written reason, just got answer: no.)
Local setup
At the beginning let’s create a local environment. This setup will include working Django server on Docker with connected Redis and PostgreSQL.
Please follow below instruction or check the already created source here.
- Create DRF application and add simple API to created app.
$ django-admin startproject [PROJECT NAME]
$ django-admin startapp tasks
- Add Dockerfile which will support Google Cloud platform SDK and Python 3.7
FROM google/cloud-sdk:latest
RUN mkdir /code
WORKDIR /code

RUN apt-get update -y && apt-get install build-essential checkinstall python3-pip redis-server -y
ADD requirements.txt /code/requirements.txt
RUN pip3 install -r requirements.txt
ADD . /code/
Add PostgreSQL, Redis and Django server containers to the docker-compose.yml.
Create local.envs file with PostgreSQL docker image variables
Run docker containers
$ docker-compose up
Google Cloud Platform
Download and install Google Cloud Platform SDK: gcloud
Acquire new user credentials to use for Application Default Credentials (If you want your local application to temporarily use your own user credentials for API access)
$ gcloud auth application-default login
This will create a redirect url to authorize your google account. Please follow the redirection.
- Create Google Cloud project in console or using gcloud:
$ gcloud projects create [PROJECT ID] --name="[PROJECT DESC]"
Google Cloud SQL
This operation can be done using console or gcloud sdk.
- Create a Cloud SQL instance
$ gcloud sql instances create [INSTANCE_NAME] --cpu=1 --memory=3840MiB --database-version=POSTGRES_9_6
- Create a Cloud SQL database
$ gcloud sql databases create [DB_NAME] --instance=[INSTANCE_NAME]
Creating Cloud SQL database...done.
Created database [DB NAME].
instance: [INSTANCE NAME]
name: [DB_NAME]
project: [PROJECT ID]
- Create a user
$ gcloud sql users set-password [USER_NAME] --instance=[INSTANCE_NAME] --password=[PASSWORD]
- To connect with database from local machine you need to set up proxy. To download proxy tool check google docs
$ ./cloud_sql_proxy -instances=<INSTANCE_CONNECTION_NAME>=tcp:3306
Google Memorystore (Cloud Redis)
I wanted to use this service as a cache for our API… but looks like it is not possible… Google documentation is describing only connection to third pary service redislab.
I spent some time to connect to the Google Memorystore (redis instance) but without success. This is really strange, I found a way to connect this service with App Engine Flexible environment but this is not what I wanted to do.

This is quite a blocker if we would like to keep our technology in Google… but I hope it is more a matter of not set up VPN or something from my side…
Google App Engine
- Create app.yaml
runtime: python37

handlers:
- url: /static
  static_dir: static/
- url: .*
  script: auto

env_variables:
  POSTGRESQL_CONNECTION_NAME: project:region:db
  POSTGRES_DB: [DB NAME]
  POSTGRES_PASSWORD: [DB PASSWORD]
  POSTGRES_USER: [DB USER]
  POSTGRES_HOST: [DB HOST]
- Deploy App Engine project
$ gcloud app deploy app.yaml --version 1
- View your application in the web browser
$ gcloud app browse
- If your are using configuration from source code, you can test your API with curl request
$ curl -X GET https://[PROJECT ID].appspot.com/tasks
Remember to set environment variables from defined Cloud SQL database instance.
Task Queues
Lately, Google released a service called Cloud Tasks (beta), that can replace old taskqueue service which was used on App Engine python 2.7. Setup is configured using yaml file or gcloud sdk. Once you will use one method, another will be not available in this project.
Before you start Cloud Tasks service, go to APIs & Services and enable Cloud Tasks API.
Using gcloud
- Create task queue in App Engine
$ gcloud beta tasks queues create-app-engine-queue [QUEUE ID]
- List queue configs
$ gcloud beta tasks queues describe [QUEUE ID]
- List all queues
$ gcloud beta tasks queues list
Using queue.yaml
- Create queue.yaml file in root GAE application
queue:
- name: default
  rate: 10/s
  bucket_size: 200
- Deploy it to GAE instance
$ gcloud app deploy queue.yaml
- Go to google console to see all defined queues
Cron job
Cron job service is the same as it was defined in an old standard. You can create cron jobs by adding the endpoints with get method to the cron.yaml file.
- Create cron.yaml file
cron:
- description: "Log each Task"
  url: /cron/tasks/log
  schedule: every 24 hours
- Deploy it to GAE instance
$ gcloud app deploy cron.yaml
- Go to google console -> App Engine -> cron tab to see all defined cron jobs
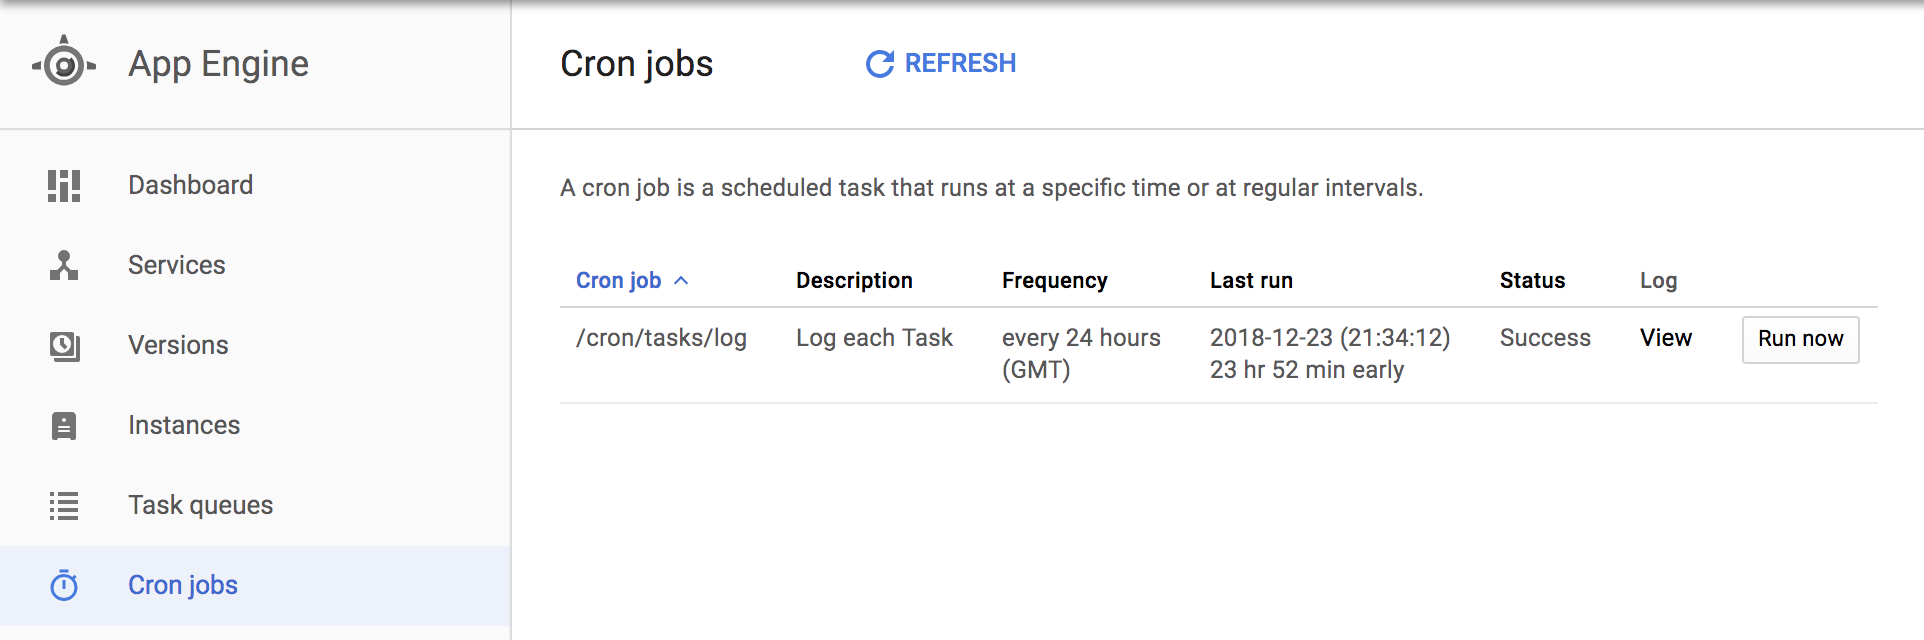
For full documentation please check cron.yaml reference.
Summary
Is it worth to start using new runtime? In my opinion, it depends… It depends on what type of project would we like to build and what are the domain features. I would not use it to make a simple proxy that heavily relays on memcache and which saves a lot of data. I would go for old environment py27 with memcache and ndb (NO SQL) as a database with a lightweight framework as Falcon or Flask.
From the other hand, I would love to use a new environment for crud applications where a lot of features are already built in Django and SQL. As you can see in the post, setup is easy but it takes some time to configure everything.
Unfortunately, Google App Engine Standard Environment on Python 3.7 runtime is significantly different from the Python 2.7 runtime. Google removed a lot of cool features like Datastore ORM, Image Service, Memcache, and others. Hopefully, some of them like Task Queues are replaced. I’ve seen some information on forums or slack channels that Google will try to work on new features to make the new environment more friendly and useful for developers.